Test web push on your website
Get started for free
The trial version includes all features
Your first steps in PushPushGo
Using the Return rate/We haven’t seen you in some time scenario, you will be able to:
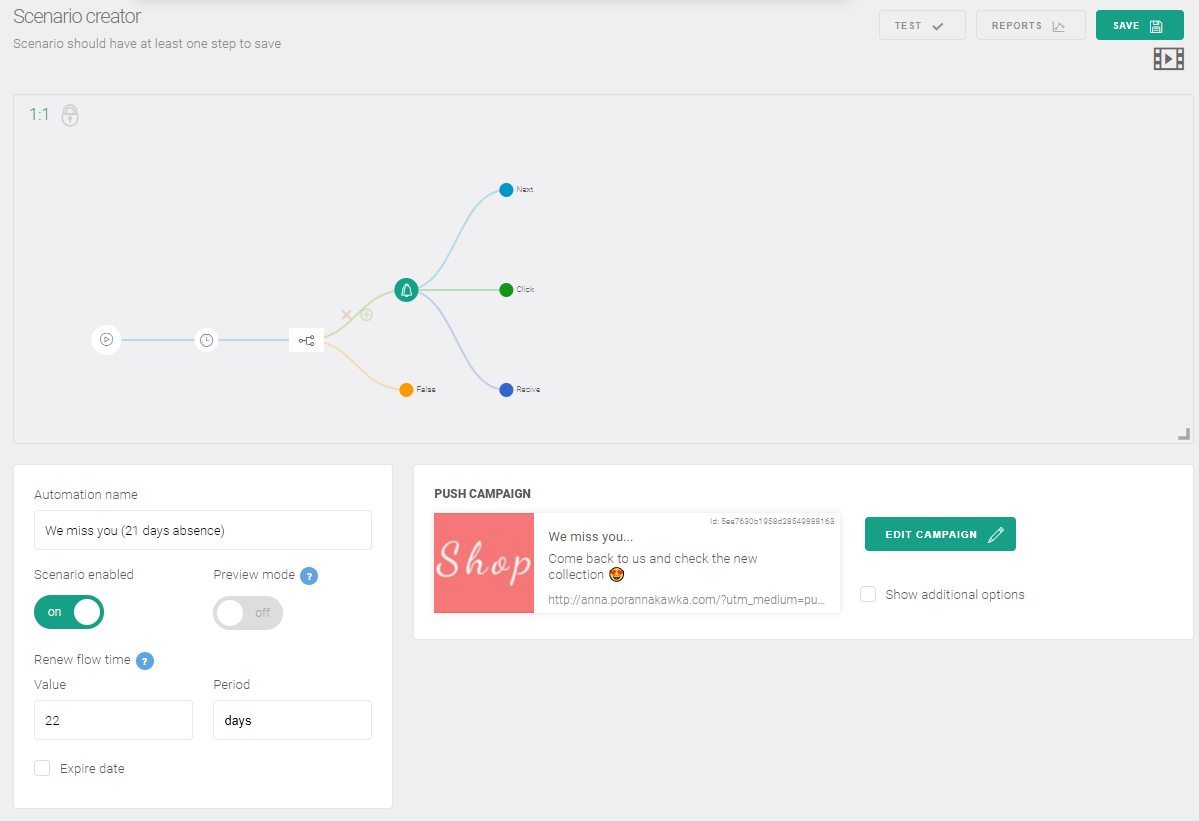
Mechanic scenario: If a customer hasn’t visited your site in a defined time period (for example, 21 days), he automatically receives a web push notification at a time defined by you that directs him to a landing page you choose.
First step:
1. Create the Custom field updating the date of the subscriber's last visit. The instructions can be found here: Custom fields and update of selectors
Second step: Configure the scenario tree:
1. In the Dashboard, go to the Automation tab and click New automation.
2. When the Scenario Wizard displays, fill in the Automation name
3. As theTrigger event, mark End of session
4. Set Renew Flow Time for one day longer than the Delay in the scenario tree.
5. Click Next on the scenario tree.
6. Select the next option, > Delay and define the time after leaving the site that subscribers receive their first notification.
7. Click Next on the scenario tree again and this time select Condition.
8. Click Add condition and select “Date of last visit” from the dropdown list. Set, for example, Date of the last visit >more than> 21 days. Remember that if you choose, for example, 21 days in this step, the Delay step must also have the same value, and the Renew Flow Time must be one day longer.
9. Save the scenario.
10. Click Next on the scenario tree.
11. In the next window, select > Action>Push
12. Click New campaign and configure the web push notification according to the guidelines: Configure campaign in automation scenario.
13. Save the scenario.
14. Before you finish, check all the parameters again.
15. If you are sure that the notification is configured properly, click Save changes on the notification form.
16. Finally, enable the scenario with the switch directly below the scenario name and click the Save botton in the upper right corner.

