Test web push on your website
Get started for free
The trial version includes all features
Your first steps in PushPushGo
Please note that in the case of Basic integration, all you have to do is paste the integration code anywhere into your website's code. The results will be that:
1. To use this integration, paste the integration script anywhere in the source of your site.
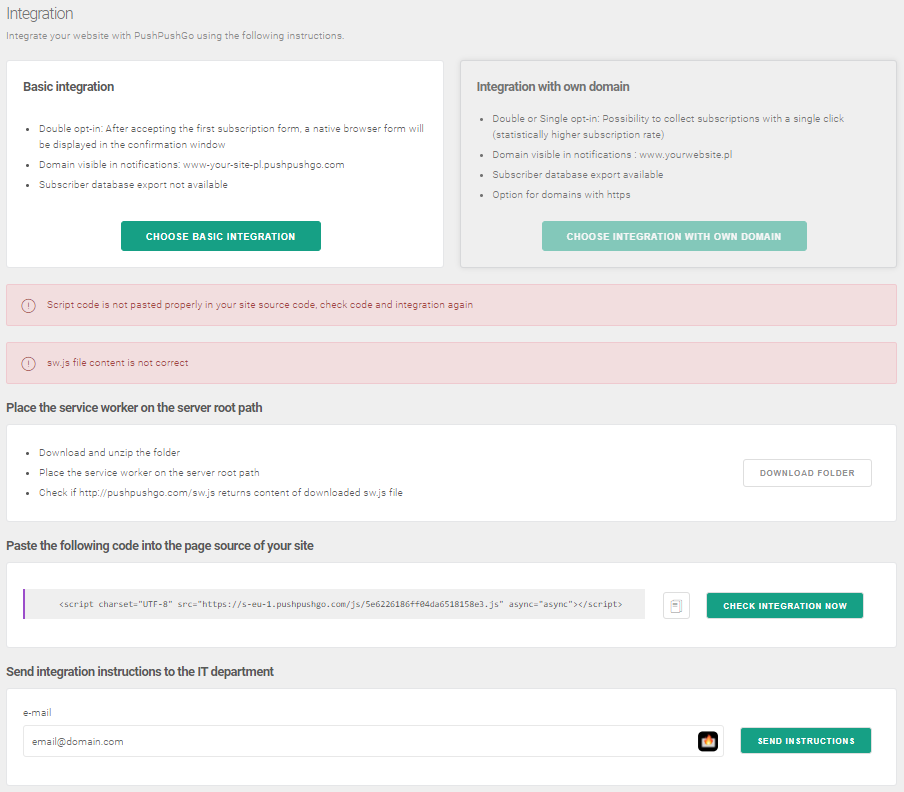
2. After pasting the script into the page source, click Check Integration to verify that everything works correctly.
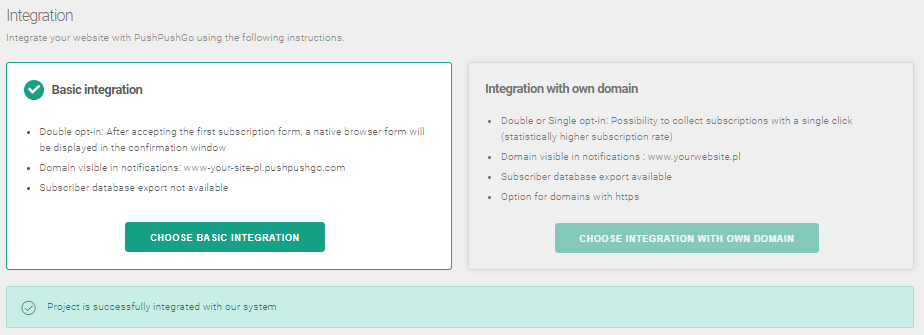
The following green message will inform you about the correct integration:
In the case of Integration with own domain, additional conditions must be met during the integration process:
Your domain must have https.
The integration script must be placed in the <head> section of your website's code.
You must add this to your server root path - a file downloaded from us: sw.js. (so that it is available from https://yourdomain.com/sw.js).
Due to the above, it is not possible to carry out this integration using Google Tag Manager.
What do you gain from this integration?
Your recipients subscribe to one-click notifications, enabling your database to grow faster.
Only your domain is visible in notifications on your website.
1. To integrate your website using integration with own domain, first download and unpack the script and then place it on the server root path.

To check its location:
2. Next, place the integration code in the <head> or <body> section in your page code and click Check Integration to verify its accuracy.

3. A green message will inform you about the correct integration and a form for subscribing to web push notifications will appear on the website.

Important! In the case of integration with own domain, if you already have your service worker on the site and you can not delete it - import the contents of the sw.js file into your file and be sure to inform us about it.
If you want to replace the address from sw.js with another one, e.g. service-worker.js, you can simply paste the new address in the Service Worker Path section of the Project settings tab. However, if you want to change the directory where the sw.js file is located (for example to static/sw.js), you must additionally add the following response header: "Service-Worker-Allowed": "/".
If you intend to add the service worker to another directory, e.g. static, then the fields "sw.js path" and "sw.js scope" (in the Project settings tab on your account) should be completed in this way:
● sw.js path: /static/sw.js
● sw.js scope: /static


