Test web push on your website
Get started for free
The trial version includes all features
Your first steps in PushPushGo
The application lets you tag subscribers in three ways:
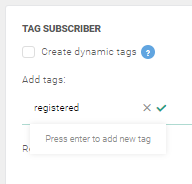
You can add a tag to anyone in the table of subscribers. Just mouse over the cell in which the tags are located and the plus icon will be displayed. After clicking on it, the window with the tag search will appear.
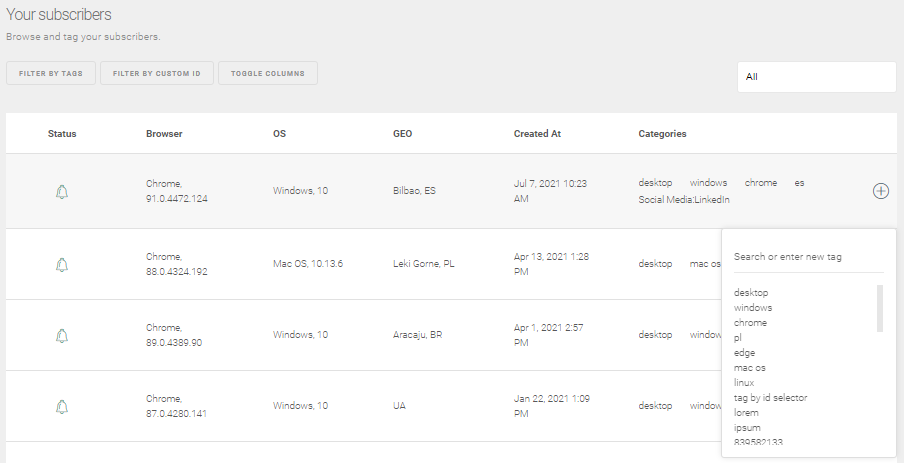
In addition to searching, you can also add new tags and delete existing ones. To tag a subscriber, click on the selected tag in the search engine or enter any string of characters and press enter to create a new tag.
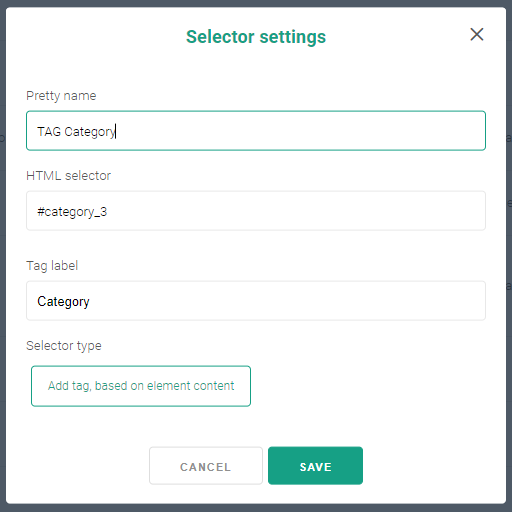
You can use selectors to automatically tag users according to subpages they visit. To do this, go to the Selectors tab and create a new selector by selecting the Add Tag action based on the content of the element.
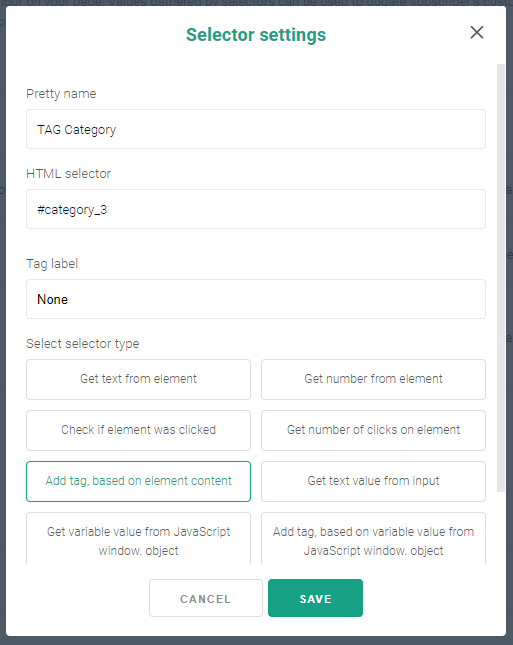
The key element of each selector is its path. This is the css class, id or path to the element from which we want to get the value and create a tag based on it. For example, if each of our subpages has a title, we can give the css class of this title in the path parameter and then the recipients will be tagged according to the titles of the visited subpages.
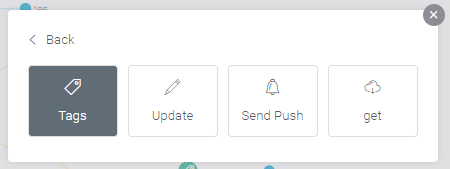
Another way to automatically assign tags is through the automation module. You can choose the Tag action at any time during the scenario, which allows you to add and remove tags from each subscriber.
Now that you know how to tag subscribers, you should learn about the possibilities it opens for using tags in targeted campaigns.
The assigned tags can be used to target mass campaigns by selecting or excluding a group of subscribers with a given tag.
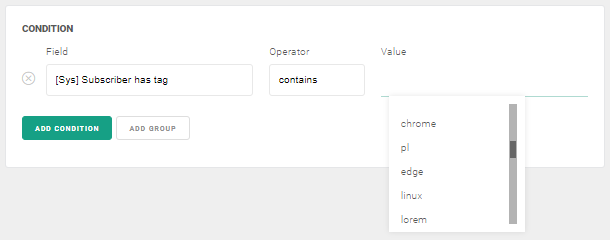
Additionally, having or not having a tag by the subscriber can be used as a condition in the automation scenario.
You can create any number of different tags, and with dynamic tagging via selector, it is possible to create a large number of tags.
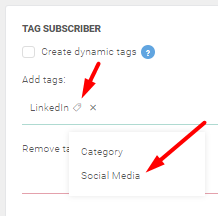
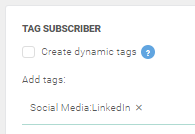
For clarity, and to make it easier to find and filter your tags, you can give them a distinctive label.
Creating labels
To create a new label, go to the Tag labels tab in the side menu and click the “New label” button.

When creating a label you can define two parameters of the tags assigned to it:

Using labels
After creating a label, you can use it in two places: