Test web push on your website
Get started for free
The trial version includes all features
Your first steps in PushPushGo
In ABX tests, you create several versions of the notification, with each version sent to a selected recipient pool. The version of the notification that obtains the best result in the form of the highest rate of clicks will be sent to the remaining recipients in the database.
Tests
The first step in the process allows us to create several campaigns to be sent to different recipients. The creation itself is exactly the same as in standard push or automation campaigns. To create new campaigns, click Add.
Percentage distribution
After creating the campaign, go to the next step - Percentage division. At this stage, you select the number of people to whom the different test notifications should be sent. You can set the number of recipients for each notification.

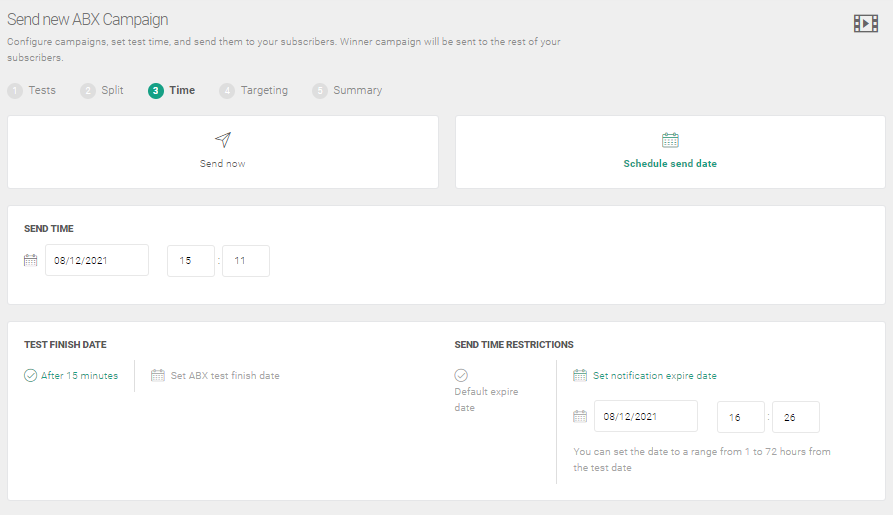
Campaign time
In the Time step, you can schedule when your test campaigns will be sent, when the test campaigns are to be completed and the limitation of the validity of the winning campaign. If you do not mark anything in this step, the campaign will be sent immediately and the test will end after two hours. Also, the winning campaign will not have a time expiration.
Targeting
The next step, Targeting, allows the campaign to be sent to a specific group of recipients. It’s just like the standard push notification process. If you do not select any group, the campaign will be sent to all recipients.
Summary
After completing all the steps, you can go to the last stage - Summary, where you can see all the information you have entered. At this stage, you can save the details of the campaign and come back to it later or schedule it for delivery.


