Test web push on your website
Get started for free
The trial version includes all features
Your first steps in PushPushGo
With the Abandoned carts scenario, you will be able to:
Mechanic scenario:The subscriber added products to the cart, but left your store before completing the purchase process. After a certain time (for example, after 15 minutes) he will receive a push message reminding him to complete the order. The notification can be repeated after 1 hour, 1 day, etc. At the same time, the "abandoned cart" tag is given to such subscribers, and then after the finished scenario, it is deleted.
First step: Set selectors:
1. Product value
2. Number of products in cart
3. Clicking on an action button, like “Add to cart”, “Pay”, etc.
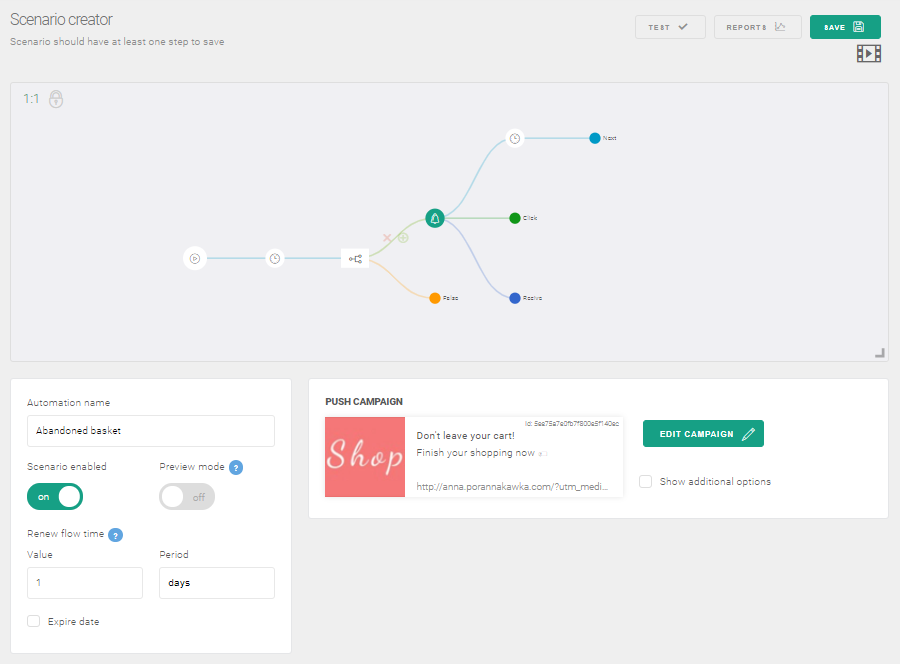
Second step: Configure the scenario tree:
1. In the Dashboard, go to the Automation tab and click the New automation button.
2. In the Scenario Wizard that appears, fill in the Automation name.
3. For the Trigger event, select End of session.
4. Adjust the Renew Flow Time to the time that your sales system holds abandoned carts.
5. Click on the Next button in the scenario tree.
6. In the next window, select > Delay and specify the time when the subscriber should receive the first notification. Our recommendation is from 15 minutes to 1 hour.
7. Then, again in the scenario tree, click Next and this time select Condition.
8. Click Add condition and select the appropriate parameter from the dropdown menu:
and
and
Remember! In order for the scenario to work properly it is necessary that all the above conditions are met by the user, therefore, between the terms of the rules use "and", not "or".
9. Save the scenario.
10. Next, in the scenario tree, click Next.
11. In the next window select > Action> Tag.
12. In the "Add tag" field, enter "abandoned cart"
13. Save the scenario.
14. In the script tree, click the Next button.
15. In the next window select > Action> Push.
16. Then, click New campaign and configure the web push notification according to the guidelines that can be found here: Campaign configuration in automation scenario.
17. Click the Save button in the upper right corner.
18. If you want to send additional notifications using this scenario, repeat points 10-17.
19. In the script tree, click the Next button.
20. In the next window, select > Action> Tag.
21. In the "Remove tag" field, enter "abandoned cart".
22. Save the scenario.
23. Check all parameters again.
24. If you are sure that the notification is set up correctly, click Savechanges button on the notification form.
25. Finally, enable the scenario with the switch directly below the scenario name and click the Save botton in the upper right corner.